This month we are delighted to feature a fabulous set of creations that showcase Robin's Nest Tear Dew Drops. If you haven't already done so, be sure to visit all postings in the Robin's Nest Blog to see all kinds of fancy uses for this go-to embellishment. Along with Tear Dew Drops, we are featuring projects using Modge Podge from this month's partner, Plaid.
When I received my first collection of Tear Dew Drops, each time I poured them in my hand, the solid black tear drops (Piano Tear Dew Drops) would just jump out at me and get my mouth to watering .... for .... WATERMELON! So I knew I just had to go with the obvious with these Tear Drops - a watermelon-themed card.
Supplies used to complete the card:
I cut ovals from the Olive (7-3/4" x 5-1/2"), Green (6-1/2" X 4-3/4"), and Red (5-1/2" X 4") Cardstocks. I folded the Olive oval in half to form a wedge of watermelon. I cut the Green and Red ovals in half - using the second half of the Green inside for my message and the second half of the Red for another card. I mixed Modge Podge and Red Dragon Embossing Powder and covered the Red oval with the solution and allowed to dry for maybe 15 minutes.
I then layered all the oval shapes...and topped the watermelon slice with Solid Black Tear Dew Drops for seeds. Makes a great picnic invitation with a matted sentiment. What I think is very fanciful is how the design on the Olive Fleur Cardstock resembles the rind of a watermelon! (Bet that's not what the artist planned!)
Okay, this entire project took maybe 20-25 minutes - with 3/4 of that just drying time! So feeling a little guilty for designing such a simple project - and with lots of Tear Dew Drops in glorious colors to use - I decided on a bonus project!
If you've been following my blog at all, you have probably figured out by now that I am addicted to Heartfelt Creations - and that green and purple make up my favorite color combination. For this project, I was inspired by my SALSA friend, Linda Wilson. At our last meeting, she shared a tunnel card - turned nightlight. While I've made several tunnel cards...the idea of using a votive light inside was new to me. Then as I gazed at all the transparent Tear Dew Drops in my hand...there was that aha! moment.
Here is my second project.
 |
| Card Front |
 |
| Card Inside |
Supplies used to complete the card:
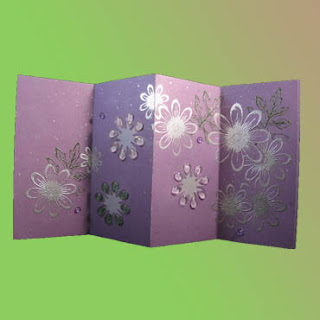
 The completed card is 5-1/2" x 5-1/2". I began with two pieces of Plum Glitter Cardstock cut 11" x 5-1/2". I folded one piece in half - PLUM SIDE INSIDE - for the card base. The other piece is folded in quarters. Using a Daisy Patch die, I cut three flowers randomly on the two inside quarters of the last piece.
 I glued vellum squares behind each flower hole. Then glued this piece to the Plum side of the other cardstock - placing glue only on the first and last quarters.
I then stamped a variety of daisies on the inside - embossing them in silver. (Remember for overlapping daisies and adding leaves, use a mask to cover any daisies already stamped.) I randomly added stamped leaves from the Delicate Asters set (love this leaf!) and embossed those in green.
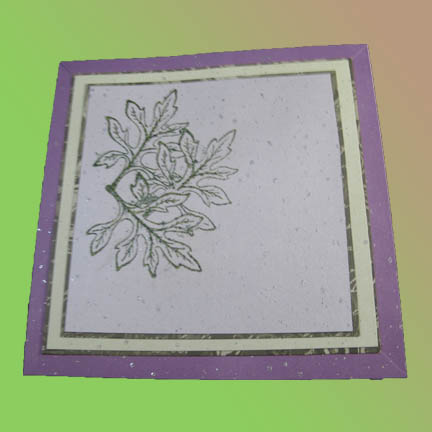
For the front of the card, I randomly stamped and embossed three green leaves on the left side of Silver Glitter Cardstock (4-1/4" x 4-1/4").
 I matted the Silver Glitter Cardstock with Olive Fleur Cardstock - then with Spring Green Glitter Cardstock - then with Olive Fleur Cardstock - lastly with Plum Glitter Cardstock (all glued to the front of the card base, of course).
I used the flowers cut from the inside and three leaves cut from Olive Fleur Cardstock and randomly placed them on the stamped leaves (cut flowers and leaves roughed up to add dimension). I finished off the front with Neon Purple Mini Dew Drops for flower centers and Rose Hips Tear Dew Drops.
I also added randomly placed Neon Purple Mini Dew Drops inside the card. The finishing touch - Rose Hips Tear Dew Drops on the Vellum flower petals to reflect light when used with a battery-operated votive light.


 Though the following pictures and video are rough, here is an idea of what the card looks like when lit with a battery-operated votive candle.
For some reason, I wasn't able to post the video here, but you can view my Facebook video here for an idea of how this looks lit up.
Design your card to match the decor of your friends' homes, and this just may be a card that is never put away! So visit the Robin's Nest now, as all Tear Dew Drops are being featured this month and are 20% Off.
Though the following pictures and video are rough, here is an idea of what the card looks like when lit with a battery-operated votive candle.
For some reason, I wasn't able to post the video here, but you can view my Facebook video here for an idea of how this looks lit up.
Design your card to match the decor of your friends' homes, and this just may be a card that is never put away! So visit the Robin's Nest now, as all Tear Dew Drops are being featured this month and are 20% Off.